

- Cladding or Weld-over on Aquamet shafts
From time-to-time we come across shafts that have suffered from a bad case of crevice corrosion. Crevice corrosion, unlike galvanic corrosion, comes from stagnant water that changes chemical composition with time. We find crevice corrosion on shafts in the seal area, bearing area and inside the stern tube. Usually the crevice corrosion is not found on the part of the shaft exposed under the boat since tidal flow keeps the water moving and “fresh”. Wiki has more explanation here.

- Running with cool bearings
A week ago I got a call from a Captain on a 120′ Sovereign that was experiencing a very troubling vibration problem. He had already had a vibration analysis company survey the boat and had another yard pull the shafts and replace all cutlass bearings. The sound was coming from the port side shaft and was described as an audible “zupe….zupe….zupe”.

Stern Tube Cutlass Bearing Completely Worn
Here is another case of poor water cooling for a cutlass bearing. This cutlass bearing came out of the forward end of the stern tube on a 123′ Feadship. The cooling line that runs to the stuffing box keeps the packing cool and provides water to the two cutlass bearings located in each stern tube.
Unfortunately, the cooling line was blocked closer to the engine and the stuffing box and bearing ran dry for a short period of time. It does not take long to completely wipe out a cutlass bearing when running dry.
Since the vessel is now in the yard for more extensive service we are removing the running gear from both sides (three shafts per side coupled by SKF Hydraulic muff couplers) and performing a complete engine alignment.
Looks like we will need a few more of the large sleeves for the SKF Muff Couplers (as seen here on a past project).

Tides Lower Bearing and Seal Assembly
A past customer called with an emergency problem. His 61′ Queenship was taking on water from the rudder seals and needed to be hauled and serviced right away.
The system was an old version Tides rudder bearing and seal Type “D” and the problem was four-fold.
The old seals were worn.
The upper bearing in the shelf had come loose and was allowing too much play in the rudder stock.
The lower bearings were out of specification allowing too much rudder stock movement. Tides allows up to .025″ before replacement.
There were no spares on the rudder shaft to allow for temporary repairs.

Queenship 61' After Rudder Bearing Repair
After haul-out we dropped the rudders and inspected the bearings. The upper shelf bearings were in tolerance and OK once re-secured in the proper aligned position. The lower bearings required replacement since they were beyond the .025 wear specification from Tides Marine. Replacement was relatively simple with the Tides Type D system. The new bearing and seal assembly threads into the existing tube that is already glassed and bedded into the hull.
Final launch and check – dry bilges and solid rudders.

Hydraulic Teignbridge Propellers
Hydraulic propellers and couplers show up from time-to-time. We found both on the 87′ Oceanfast project. Hydraulic propellers are installed on shafts with a very shallow or flat taper. There are no keys or keyways in the shaft. Hydraulics are connected to the ports and inject a high pressure layer (up to 40,000 PSI) of hydraulic fluid between the prop hub and shaft. The hydraulic pressure expands the prop hub and creates a layer of fluid that allows the prop to slide off the shaft (actually it goes with a bang similar to popping any mechanical prop).

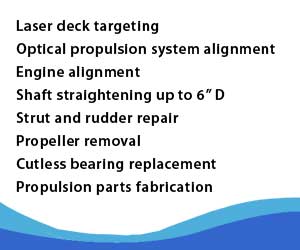
Laser through to Engine Room Bulk Head
Deck Targeting is an absolute requirement for some yachts to ensure the vessel is block on land in the same shape as in the water. Light weight vessels that do not have a strong keel structure will “hog” when picked up in the travel lift slings. If the yard crew blocks the vessel with this hog shape (higher at the sling points and lower on the ends) then any attempt to run an optical scope alignment will fail.
The answer is a laser deck target, double or triple beam. The laser is set while the vessel is in the water. Measurements and marks are made prior to haul-out. Once on land the blocking crew are instructed by High Seas to make blocking and jack-stand adjustments to recreate the measurements exactly.
Sometimes the laser needs to be raised up to shoot all the way to the forward engine room bulk head. A tripod gets the job done as seen in the photo.
This project will involve a complete engine alignment and running gear overhaul on an 87′ Oceanfast. This particular vessel is a full keel design and very rigid. The laser deck target showed that there was almost no flex or hogging during the haulout. It is great to know the vessel is blocked accurately so that we can proceed to the optical scope alignment and make changes to the engine or strut alignments if necessary.

Palmer Johnson Designed Prop in Front of Strut
You don’t come across this design too often.
This 90′ Palmer Johnson was one of only a few built with a novel design. The prop is in front of the strut. The concept allows cleaner water to enter into the prop thereby increasing the prop’s efficiency.
In order to keep the vessel running smoothly our machine shop carefully mated the stub shaft to the prop face. Cutlass bearings are a challenge since it is difficult to get clean water running just aft of the prop in the skeg/strut.
We just finished an interesting project on a 52′ Tiara Express Cruiser. This boat came to High Seas after other mechanics failed to fix a major vibration problem. During sea-trial and subsequent dial indicating measurements it was obvious that there was an engine alignment problem. This is a v-drive engine which makes engine alignments very difficult – you must make engine mount adjustments that are opposite of the common approach which can confuse even the most experienced mechanic. Engine alignments by prior mechanics were probably done in the water which will not help if the transmission flange is not aligned with the shaft tube. Go here for more info on alignments….
During our disassembly we measured the distance from the single cutlass bearing in the strut to the coupler on the transmission. We found the distance far exceeded the recommended distance between bearings as calculated in the Aquamet Crucible guide. Any vibration from a misalignment or bent shaft would be exaggerated by a shaft whip condition. Our solution – straighten the shafts, align the motors and add a half cutlass bearing in the stern tube. Not a complicated or expensive solution.
The results speak for themselves. It only took a few minutes of sea-trial running the boat at cruise and WOT to feel a big difference in the smoothness of the ride.
Another happy customer and problem solved.

- Crevice Corrosion on Shafts will Destroy a Lip Seal System
While working on a complete running gear service for a new owner on a 103′ Cheoy Lee we came across a few items that needed repair. One item was extensive crevice corrosion on the stainless steel propeller shafts. Crevice corrosion occurs when a vessel sits too long in still water. It is most often found in the cutlass bearing, seal or exit tube area where water is not flowing. Crevice corrosion is most problematic in the Tide Seal (Lipseal) area since the seal requires a tight fit on a smooth turning shaft surface. The pitting in the corroded area immediately leaks and damages the seal.

- Too Much Torque on this Tide Seal Housing – Major Failure
Recently we had an 80′ Lazarra come out for basic bottom and propeller work. A courtesy inspection of all running gear exposed a major problem for this new owner and crew. The Tides Seals – Sure Seal (dripless) system was cracked completely through. The outer ring and collar are solid pieces that should not show signs of cracks or splits. Unfortunately, the repair requires removal of the coupler which is the first step to removing all of the running gear.
 Click to watch the video of a day at High Seas Yacht Service.
 Click to watch Marine Industries Association of South Florida video featuring Salty Jobs at High Seas Services.