

Schaffran Propellers after reconditioning
On a recent shaft job for a 121′ Heesen we had to remove the Schaffran props pictured here. If you are in the commercial vessel business their props would be small compared to tugs and freighters. However, in the 100 – 180′ mega-yacht business there are hefty units coming in at over 1,000 pounds each with a hub length over two feet. These props will push a 121 footer over 30 knots with twin MTU 4000 engines.

A Fluiten shaft seal in two halves on the bench
We have just finished a complete shaft system on an 87′ Ferretti that had a unique shaft seal system from Italian manufacturer Fluiten. The Fluiten shaft seals are part of the “face seal” family. There are two main parts to any face seal system; the stationary body (right side of pictures) that is bolted to the stern tube and the “rotary” piece (left side) that is attached to the shaft and rotates. The Fluiten relies on a pre-loaded spring in the stationary unit to keep constant pressure between the halves preventing the sea water from coming in.
During shaft maintenance all components need to be inspected. With Fluiten shaft seals there is a small phenolic ring that is allowed to wear with time similar to a brake pad. This version of the seal has the wearable ring on the rotating half. However, other models from Fluiten have the wear ring on the stationary half.
The ring specification is 2 mm minimum before replacement.

Measure the wearable phenolic ring for proper thickness
Make sure your service provider is checking all of the manufacturer’s specifications. Not all companies will go to this length. Reassembling the boat with a wear item that is past its life is a disservice to you and potentially dangerous to your boating experience.
 Sometimes a full replacement is a better solution than a repair. This 50′ custom sailing catamaran had rudders that were hard to turn. The original rudder system used a plastic roller bearing system. Upper and lower bearings were articulating, self-aligning. The upper bearings were in good shape. The lower bearings required service or replacement. Unfortunately, the lower bearing was glued into a rudder tube with no serviceable access. Removing the bearing would certainly damage the bearing and require replacement. It was time to consider alternatives.
Tides Marine offers a very nice replacement rudder tube system. A fiberglass rudder tube comes complete with upper and lower UHMW bearings and an upper lip seal. The technical support team at Tides Marine were extremely helpful in working through the engineering details. The existing rudder stock was tapered which created a few complications for the rudder bearings. Not a big problem since Tides has a machine shop to handle the odd dimensions and custom specifications.
The replacement process requires the old tubes be removed from the vessel. A sawzall and some patience allowed the old rudder tube to drop right out of the boat. The new tubes were inserted, using the rudders as an alignment jig, and fiberglassed into place. Our friends at P & S Yacht Services did a clean, professional job fiberglassing and fairing the tubes in place.
After reassembly the rudders were tested – a light touch with one finger moved the rudders effortlessly.
 In “Bent Struts”, one of my prior posts, we discussed straightening a slight bend in a strut. The pictures in that post showed a very minor bend that was hardly noticeable from an untrained eye.
It doesn’t take any training to see the bends in this pair of struts. The shafts and props tell the full story – a hard grounding.
The machine shop will straightened the shafts after determining no cracks. The prop shop will recondition the props. We attempted to straighten these struts by a variety of set-ups in our H-press and straighteners. Unfortunately the metal memory was hard to overcome. Next we brought in some heat to move the process along. After a great deal of care and many attempts to move the struts the inevitable occured – with a loud bang. The strut cracked. That condems the struts to scrap metal. We gave it a good shot but the customer knew the likelyhood of savings these struts was minimal.


New vs. Old Generator Mounts
One of our good customers in a 10 year old Oceanfast had a big problem with generator vibrations. Upon inspection it was clear that the old generator mounts had “pancaked” and lost all of the isolation properties. (See photo for old vs. newly installed mounts).
After consulting with Tides Marine on new Isoflex Mounts a new engine mount was recommended to fit the application. The installation was very simple since the Isoflex mount used the exact same bolt pattern – no drilling or other modifications required. All 8 mounts on two generators were changed in one day keeping labor cost very low.
As soon as the new mounts were installed the crew could not wait to fire up the gennies and run a test. The initial feedback was excellent; “huge reduction in vibration – maybe 75%” was the subjective comment from the Captain.
The cost of the mounts is very reasonable and labor cost was low. This is an easy upgrade for your vessel. If you have mounts that are 10 years old and you are in the area give us a call and we can turn a small job into a big improvement.

Rudders on 111' Inace
One of our customers ran into a major problem with rudders that were seized in position. The rudder hydraulics had failed due to overloading. We knew it was a problem when a mechanic in the rudder room could not move the tiller arms using his legs and back.
Once hauled (the vessel had to be towed in) the rudders were removed. At High Seas we like to meet our customers prior to haul-out in order to start the steering and rudder removal process. After haul-out and during the pressure wash we complete the disassembly and can drop the rudders prior to final blocking. Most rudders are too tall to remove once the vessel is blocked. If we work efficiently with the yard crew we can avoid a second lift (which is an additional charge for our customers).
Once the rudders were removed the bearings were carefully inspected. Everything was within specification (the vessel is only three years old). The problem was in the packing. The manufactured used Teflon packing in a traditional stuffing box. The rudders were a constant leaking annoyance for the crew and someone had overtightened the packing gland. It is possible to torque down the packing gland with Teflon packing to the point where the rudders will not move.
We clean all components and repacked with more traditional flax packing. Once everything was re-hung the rudders turned without any effort at all.

- Shaft Damaged with Electrolysis
A simple prop change on a sailboat turned into a major surprise for the owner. All of the zincs were gone by the time it was hauled into our yard. The Maxprop had badly damaged prop blades due to electrolysis. Once the prop was removed the Spurs cutters showed similar damage.

Milled Strut Base Plate for Alignments
On a recent strut alignment on a Cheoy Lee we ran into a situation with bottom clearance. The vessel unfortunately sat on the bottom and the upward pressure caused the strut to bend or bow. We dropped the strut and straightened it in our machine shop (see prior post). Re-hanging the strut in the right aligned position requires a level of precision to get it right. Once the strut pocket was cleaned and the strut was dry-fit for a test alignment we realized that the imperfections in the original strut casting left humps and hollows. The high points contacted the hull in the wrong spots and prevented us from adjusting the strut to the right position.
The solution – mill a small amount off the strut pad – approximately 0.050-0.075″. Not enough to cause any concerns with the integrity of the strut. As you can see in the picture the original pad had plenty of beef.
Once properly aligned and assembled the vessel was launched and we went for our traditional sea-trial. I always like to sea-trial a vessel to make sure it is vibration-free and the customer is satisfied. It is also the right time to ask for a reference, which this Captain gladly allowed.

Bent Strut in Machine Shop
Bent struts are obviously an alignment problem. The only way to correctly fix a bent strut is to remove it from the vessel, straighten out the bend in the machine shop and reset it to the boat using the optical scope alignment process.
This strut came out of a 109′ Hargrave. Apparently she spent some time docked in a slip that did not have much water. A few hours resting on the prop in very low tides put enough upward pressure on the strut to cause the permanent bend.
Some yards attempt to heat and bend props while still attached to the vessel. This might work in an emergency to get you to a destination or final work yard. This is never a good idea for a permanent fix. You can’t get the bend back in the right place and getting an alignment within 0.010″ with sledge hammers does not work.
Once the strut was reinstalled, shaft straightened and overall alignment completed, a sea trial went perfectly. Another customer with a smooth boat that is now part of our customer reference list.

Same Strut after a little machine shop work

- Soundown Thrust Element – Old Deterioration vs. New
Soundown Vibration Dampening systems are usually found on older large yachts. This one came out of a 123′ Feadship. The center stud has two urethane “Coupling Thrust Elements” that have a finite life and should be checked every 10 years. The Thrust Element in the photo was 50% deteriorated and came out in small pieces. The picture shows the remnants on the bolt washer and in the part. The new urethane part is also shown in the picture.
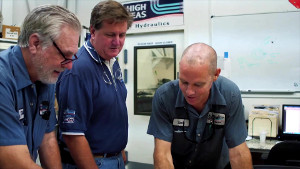 Click to watch the video of a day at High Seas Yacht Service.
 Click to watch Marine Industries Association of South Florida video featuring Salty Jobs at High Seas Services.